I ordered the mud flap set from WhiteHouse Audi, in the UK.
Contact Martyn Franklin
Audi Part number: 8NO 075 111 - Fronts
Audi Part number: 8NO 075 101 - Rears
They come nicely packaged, with all hardware.
You will need;
Torx T-25 driver
#2 Phillips driver, or power driver (Makita or
Porter-Cable thing)
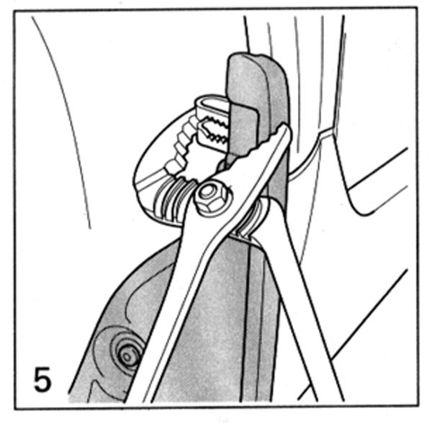
Adjustable wrench (water-pump type pliers)
You will also need to remove the rear wheels

Audi Mud flap Installation
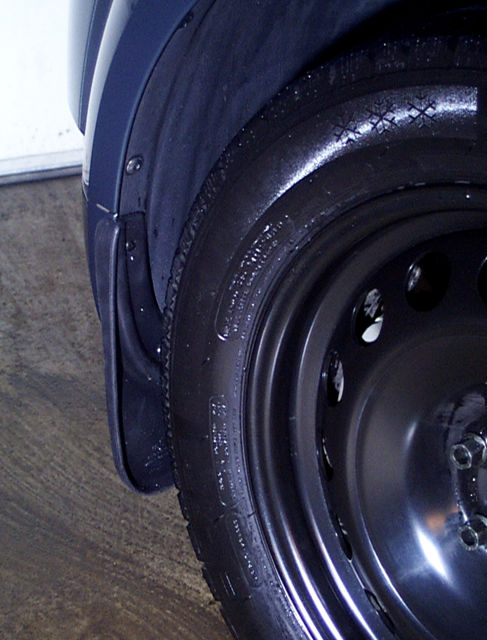
These mods were done on a Roadster. Start by removing the rear wheel.
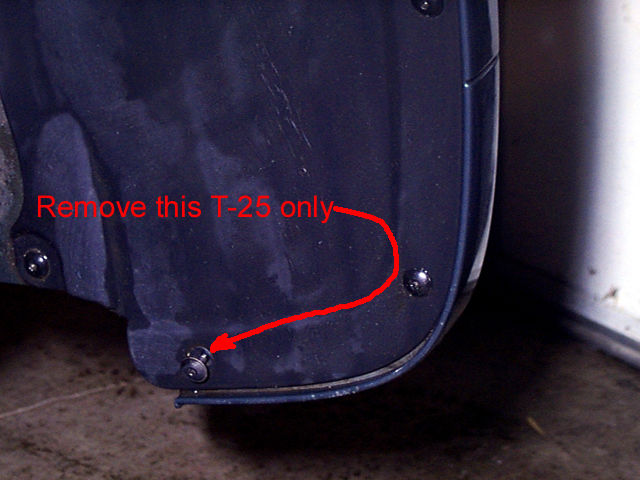
Use an appropriate jack. Remove the 1 T-25 Torx screw shown here. (Left
Rear shown)
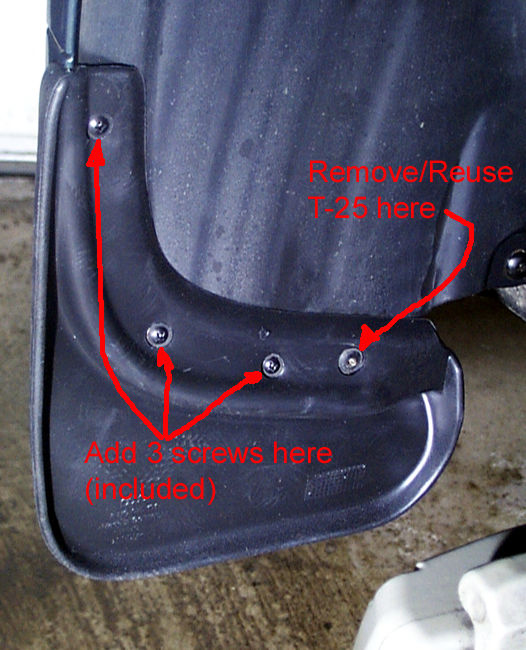
Position the flap over the holes. Re-Install the one Torx
screw. Right Rear Shown here. It's easy to use a power driver to install
the 3 Philips screws. They screw easily into the plastic splash panels
in the wheel well.
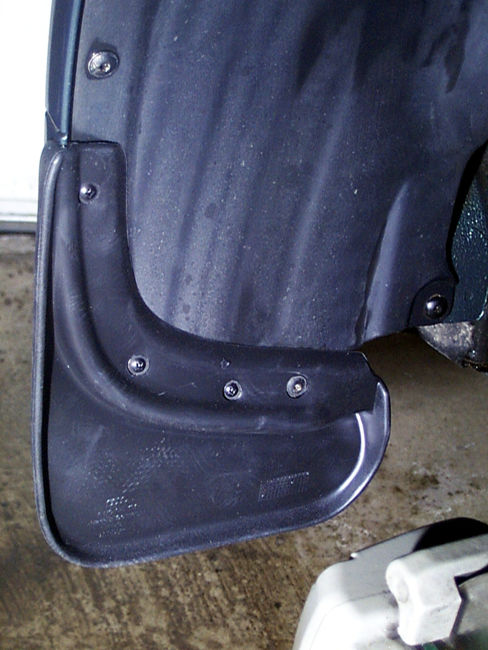
That's
all it takes for the rears!
Now
you can move to the fronts. Start by turning the steering wheel all the
way to the right. (Obviously, you will need to turn the wheel the other
way, when you do the other side). Rightside, passenger side shown here.
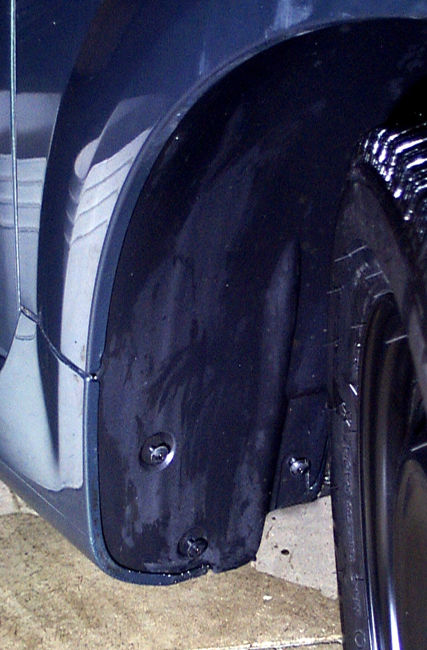
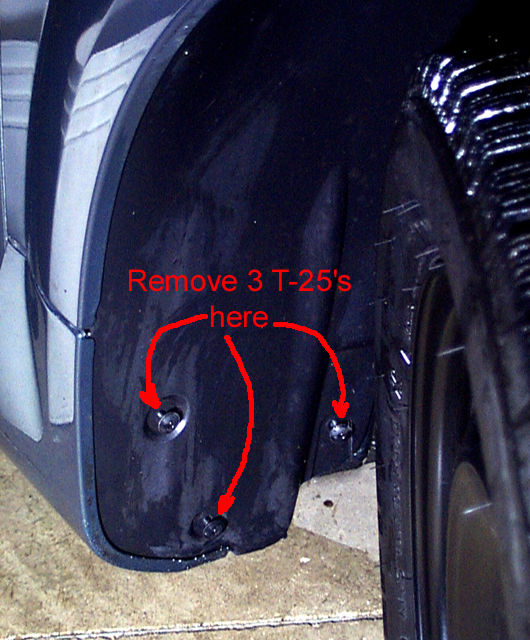
Remove
these 3 T-25 torx screws.
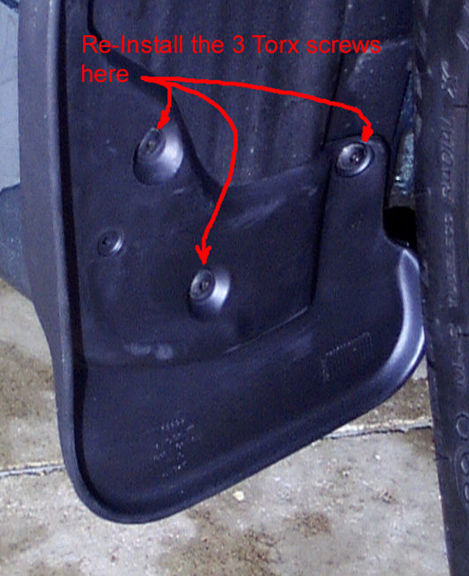
Position the front flap, and re-install the 3 Torx screws
as shown.
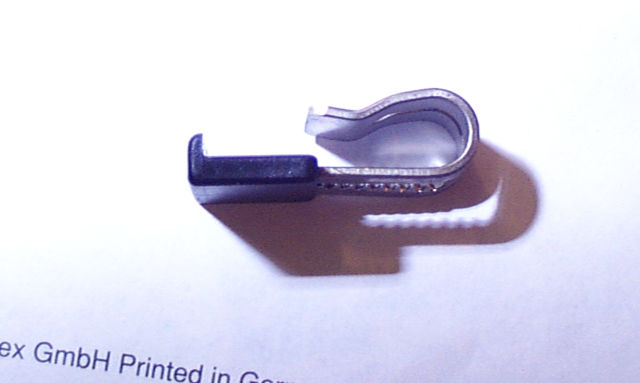
Now
comes the tricky part. Take a close look at this clip. I played with it
for awhile, and found that the easiest way to install this, was to
position the metal clip just into the plastic clip by one detent stop.
You will see and feel this when you actually do the install. It's too
difficult to position both pieces separately, then try to push the metal
clip in behind the curled edge of the internal part of the fender. Take
a close look at this, and position the parts before you try this.
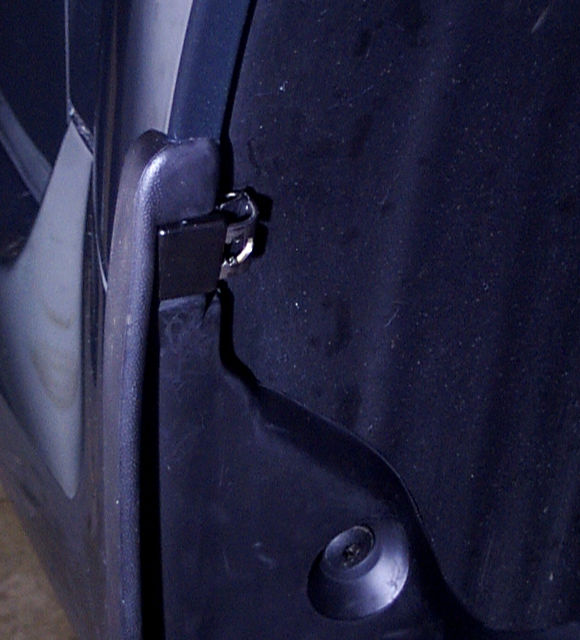
You
will need to position this clip assembly onto the top of the flap. You
will also need to work the curved part of the metal clip, under the edge
of the fender. You will have to get in close to see this. Then you can
use the pliers to force this all together. Put something over the front
part of the flap when you squeeze the pliers, to protect the outside of
the flap
This is what it looks like installed.
Here it is completed
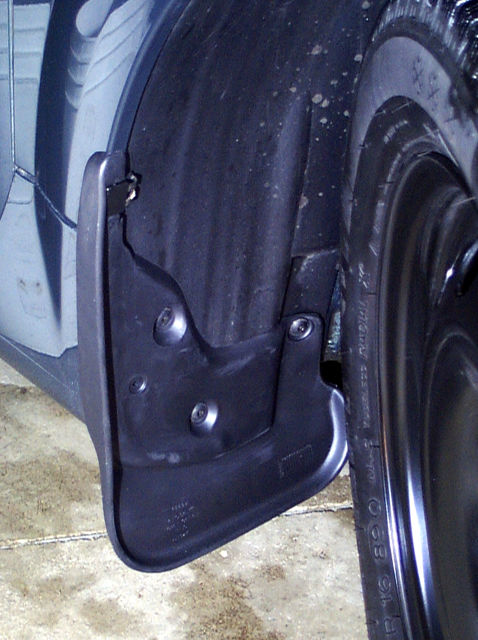
That's all folks!